Conversions Import Service
We provide our clients an opportunity to postback any actions into our system for more effective campaign optimization.
-
Conversions Import Service
The service accepts three GET parameters:
- clickid - it can be received via {clickId} macros from our system and should be forwarded back to our system.
- payout - the conversion value in $, fractional number is possible, separator is a dot. For example: 1.5.
- type - conversion type, three options are available: goal1, goal2, goal3. User can make 3 different conversion types which will be forwarded up. Example: registration -> goal1; sale ->goal 2, etc.
To import all conversions, they should be sent to the domain http://conv.adxadserv.com/ using the GET method.
An example of a complete request:
http://conv.adxadserv.com/?clickid=d94ff74f-ea02-4153-ac04-111119!44117&payout=1&type=goal3
How to set up.
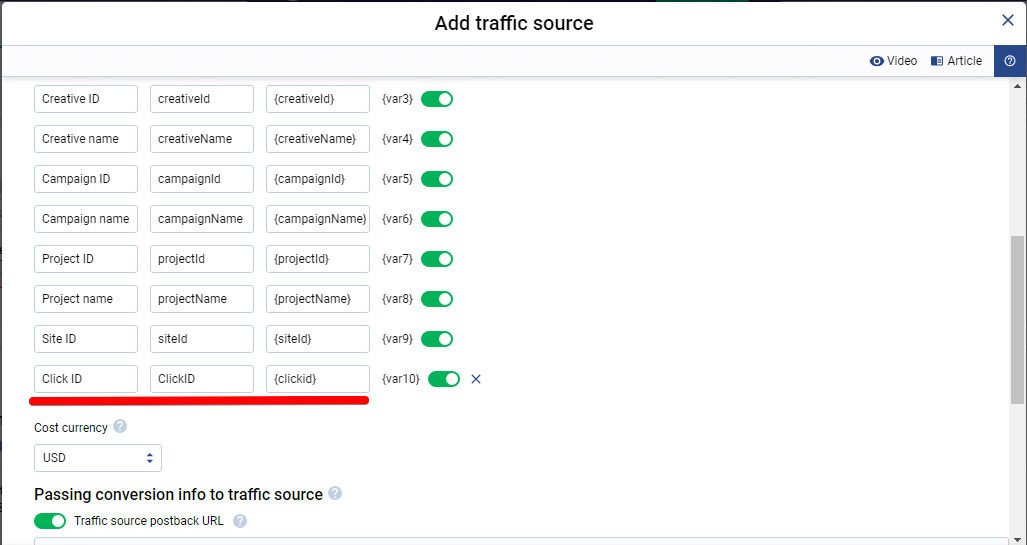
Step 1: Adding ClickID token of ADxAD to the traffic source template in a tracking system.
{clickid} token should be added to the template and set equal to any token of your tracking system:

Now ADXAD token can be used.
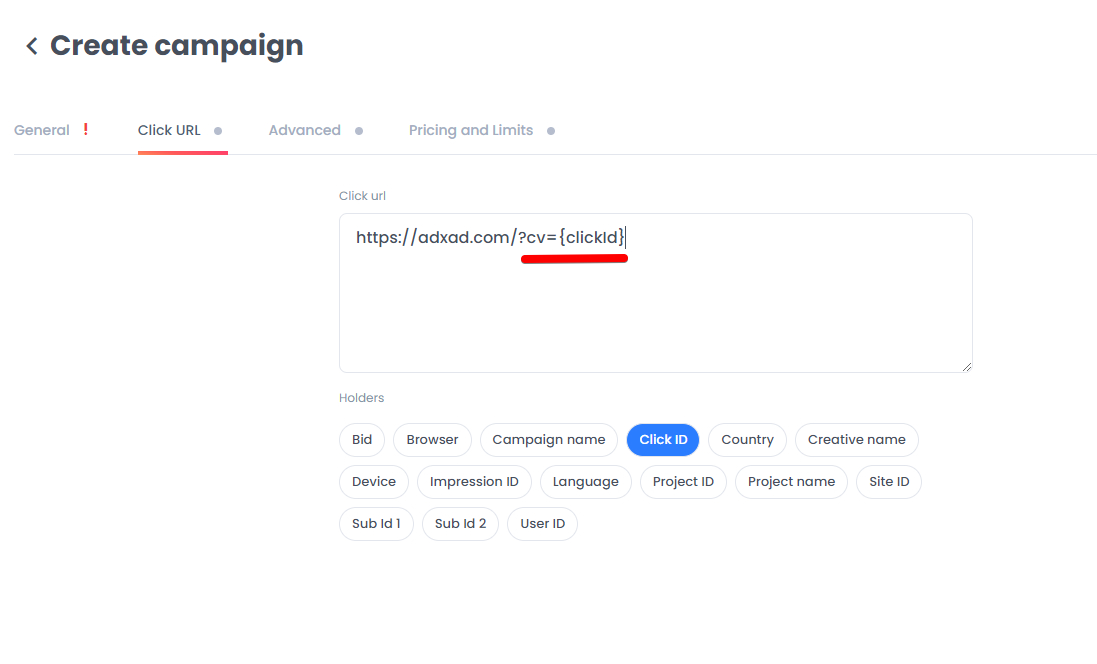
Step 2: Receive ADxAD ClickID to your tracking system.
{clickid} token should be added to your click url in the ADxAD campaign settings:

Now after a click happens, ADxAD system will replace the token with the internal clickid and your tracking system will be able to recognize the click ID of the external system.
Step 3: Setting up the postback url.
ADxAD postback url should be added to the postback section of your tracking system.
ADxAD postback url:
http://conv.adxadserv.com/?clickid=%insertyourtoken%&payout=1&type=goal3
%insertyourtoken% should be replaced with the token of your tracking system, which will forward ADxAD clickID into the ADxAD postback URL.
Payout = put here a value of a single conversion which will be postbacked.
Type = put here the type of conversion (goal1/ goal2/ goal3 are the possible options).
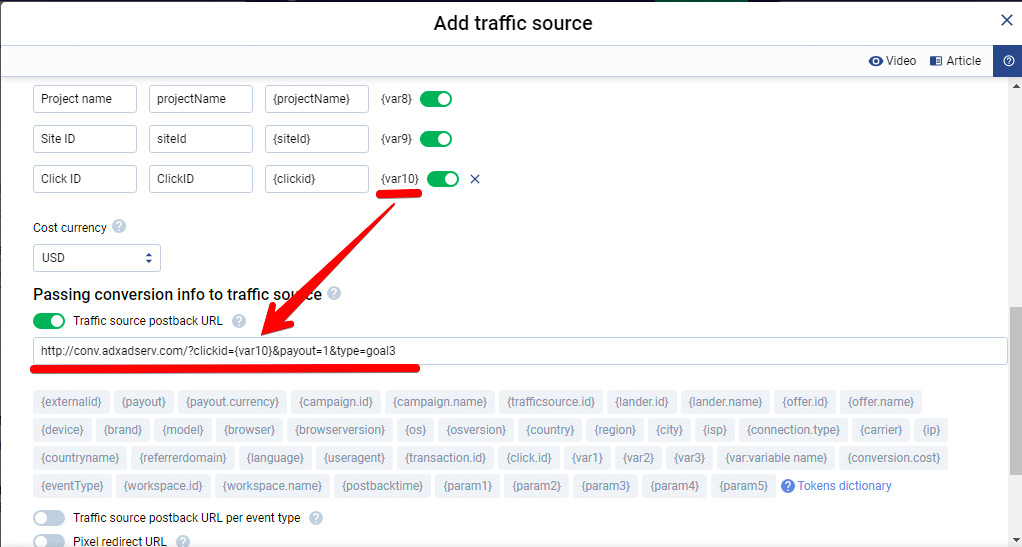
How a ready-to-go integration should look like on the tracking system side:

The integration is done.
